I made a sequel to this post!
https://midgetsausage.newgrounds.com/news/post/1530600
Hiya. I just wanted to write this quick and dirty... guide thing, which are all pretty important lmao. I spent like 4 years learning all these from random ass sources, and I hope anyone learning Flash might take a thing or two out of what I wrote here.
I don't care if you know some of these already, I just wanted to write these down somewhere. There's still some people who might benefit from these more than you and I will ever do, anyway, so who knows? Also I stole some of them off Alan Becker lmao
but anyway
1.) Actually exporting a video in high quality and not making it sound like garbage
Go to your Properties panel and click Publish Settings. Then...
- Set JPEG quality to 100 (idrk what it does but I just do it for good measure)
- Click Audio steam/Audio event and, please, for the love of god, PICK RAW COMPRESSION. Don't pick MP4. idk what kind of monster still picks MP4 and it always irritates me when someone picks that shit, so please select Raw.
- Don't also forget to turn off Convert stereo to mono and set the sample rate to 44kHz.
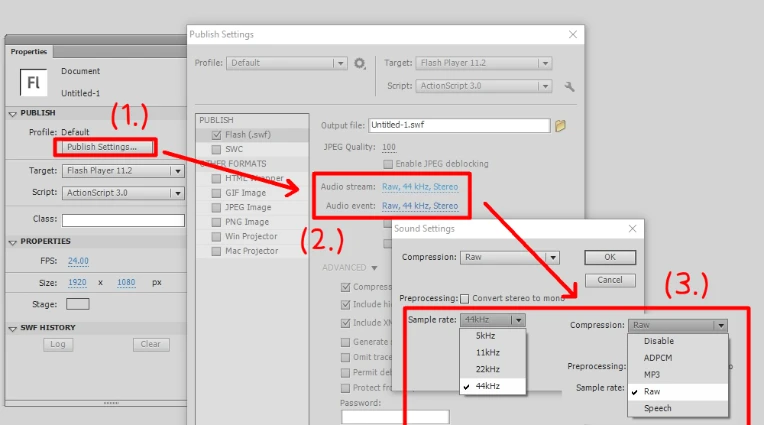
The reason why those default settings existed and were the default settings is because .swf files needed to be nice n compact to load easily back in the wild west era of the Internet. We don't live in that era anymore, since we share our animations in nice and safe .mp4s instead of .swfs, which means we don't have to compress this stuff that much and it can be as high quality as we need it to be.
After that, just publish your movie and fire up Swivel, yada yada, done.
Keep in mind that you have to do this every single time you make a new file. Tedious, yes! So if you don't like that...
1.5.) Making those settings the default settings
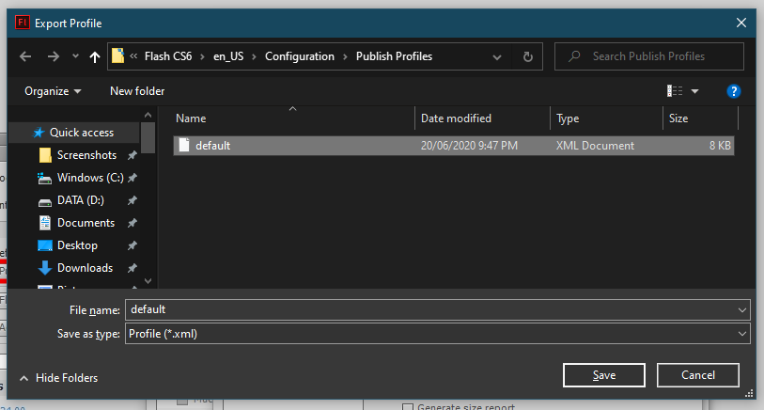
Now that you've done the above steps, don't close the Publish Settings yet. Look up. You see that cog icon?

Yeah, right there, click it. It'll bring up a menu. Select Export Profile.
Right off the bat we technically can't change the default settings, because those are the default settings after all. What we can do however is delete "default.xml", which is, like, the only file there, and then just save YOUR settings as "default". That's it.
The next few sections will be all about stuff I wish I knew sooner.
2.) Keyboard shortcut for classic tweens
Boy, you don't want to keep on right-clicking and all every time you want a classic tween! Classic tweens are the bread and butter of Flash animation (at least, for a lot of you) so having to click two buttons rather than just one shortcut for such a ubiquitous action is maddening.
Go to Edit > Keyboard Shortcuts. The first thing you need to do is, if you haven't already, duplicate the default set of shortcuts by clicking the first button on the left.
It'll prompt you to give it a name. Name it anything you want.
The reason we have to do this is because much like the Publish Settings from before, Flash doesn't want you altering the default set. This time though, that's okay, because that means if you ever set your own shortcuts into something godawful, you can always revert back to Default.
Go down to Drawing Menu Commands > Insert. There it is, "Classic Tween." Click that, then go down and click the Plus button. I recommend setting that to Ctrl+M, so press Ctrl+M if you want to, and click Change. That's it.
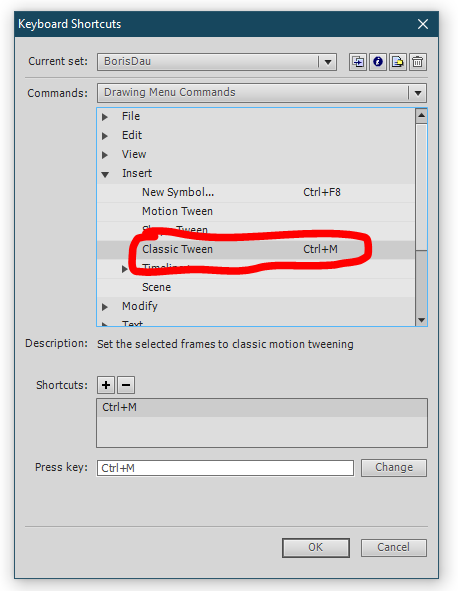
Now every time you want a classic tween, you just click on the frame and hit Ctrl+M. Neato.
3.) Centering literally anything
This is a very basic thing but I had to struggle with this for 3 years before I finally found an actual working answer.
Meet the Align window, with a horizontal bar graph as an icon. If you don't have it, go to Window > Align, or just hit Ctrl+K. Whichever option gives you the same result: the Align window will open.
Select whatever thing you want centered and just hit these two. The former centers your selection to the stage horizontally and the latter centers it vertically.

4.) "Add Outlines To Selection"
Because there are just some moments where you want to put outlines in this one big thing with lots of individual parts, and you don't feel like ink bottling every goddamn part.
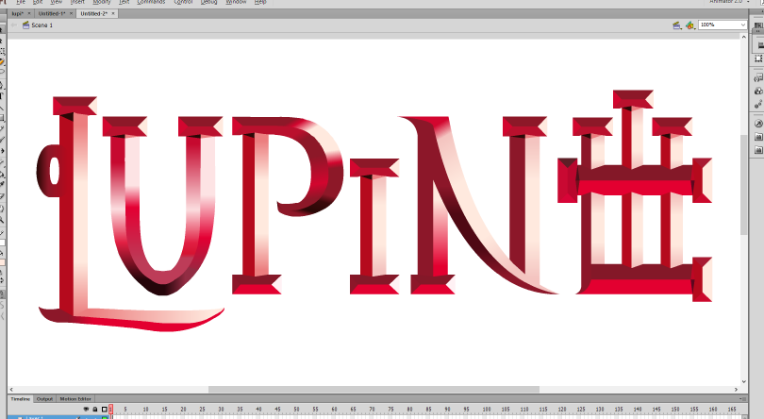
So how are we gonna add outlines to our selection? Simple. Open up your text editor of choice, and copy paste these two lines of code.
fl.getDocumentDOM().selection[0].x+=0;
fl.getDocumentDOM().setStrokeSize(1)
Save it as "Add Outlines To Selection.jsfl", do NOT name the file something wacky.
What you wanna do next is open up your file explorer and go to this location:
C:\Users\[ur computer name]\AppData\Local\Adobe\Flash CS6\en_US\Configuration\Commands
Drop the JSFL file in there.
Now, when you open Flash, just select the things you want an outline on, and go to Commands and select "Add Outlines To Selection" (the command name is based on what the name of the .jsfl file is, which is why I asked you not to name it something stupid). It'll give everything you selected a nice outline.
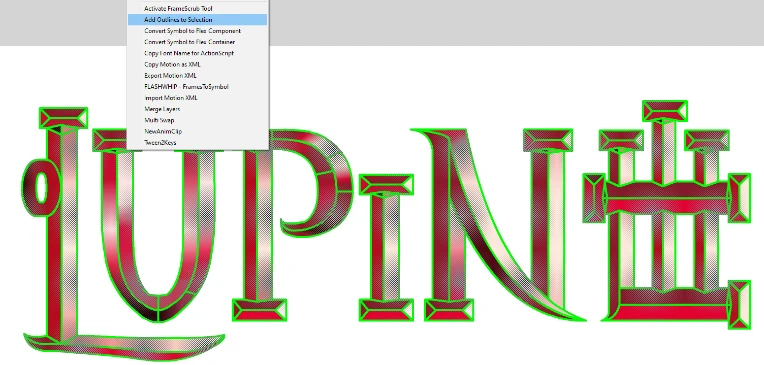
5.) FLASHWHIP - Frames to Symbol
I showed my list of commands above and yes, Frames to Symbol is there, so I might as well go along and talk about that too. It was something PhantomArcade showed off in an old tweet, and Jesus Christ it's incredibly useful.
Basically what it does is that you select a group of frames you want to turn into a symbol, and you run the command, and it does exactly what it says; frames to symbol.

I'll save the speech for later; this is where you can get the plugin. It's only, like, a few kilobytes big. https://mega.nz/file/2fx1waBD#YJT5ooKfZ4-wjibIEhglRcxsq7QM6f_zx9JjcXLcVx0
Install that shit and boom. Now you can select some frames, open up Commands > Frames to Symbol, and run that thing for yourself.
6.) "Symbol Nesting"
Whenever I show the AWoT trailer I made for Round 5 of the 2021 Summer Animation Jam several months ago, one of the most common questions I get is "HOW THE FUCK DID YOU DO THAT?"
The other question is, of course, "HOW THE FUCK DID YOU DO THAT IN FLASH?"
None of that would be possible without the help of a thing unofficially called "symbol nesting", a.k.a. one of the reasons why I haven't left Flash for Toon Boom yet. (the others include Flash's lovely timeline, its versatility in motion graphics and general ease of use.)
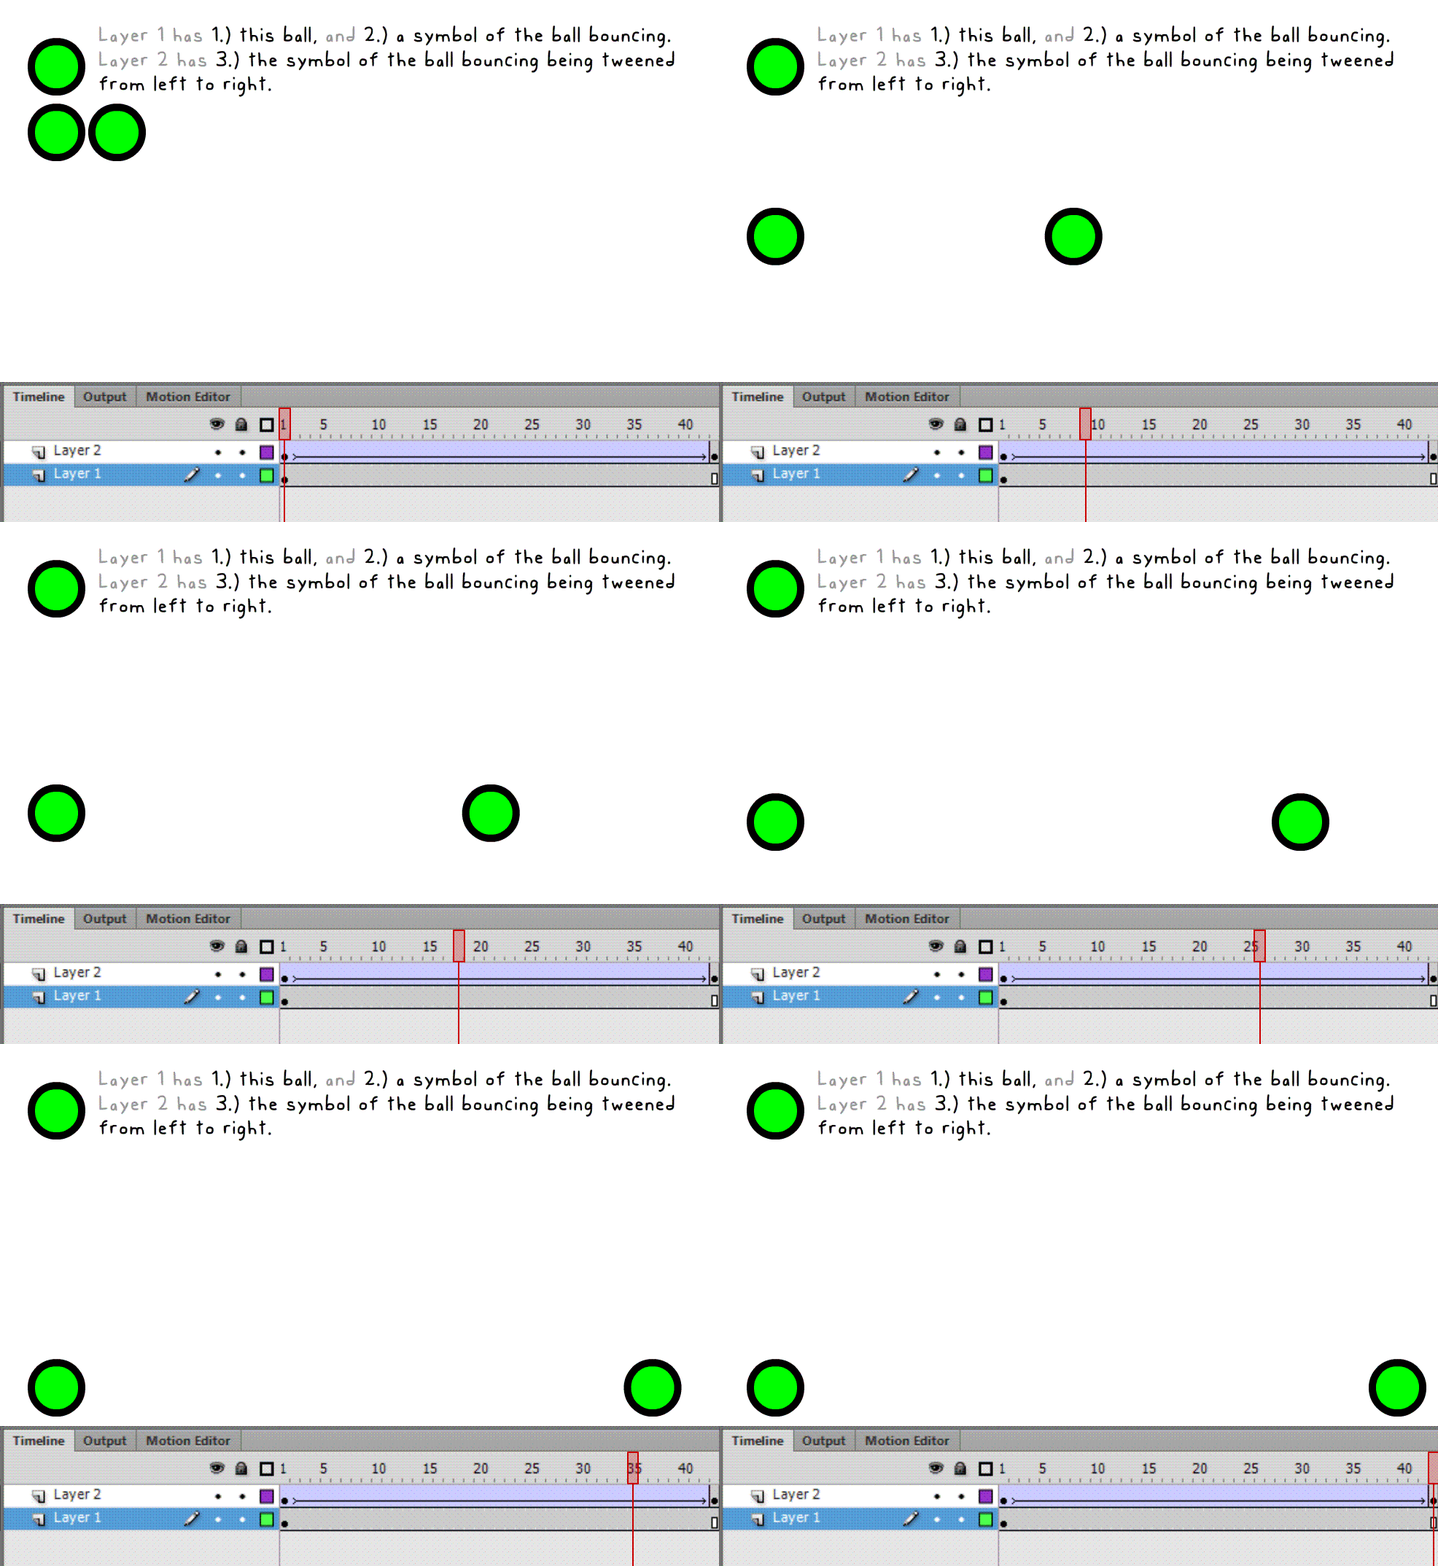
Basically, you have a symbol inside another symbol. Like in the example above,
- Symbol 1 is just a ball.
- Symbol 2 is just Symbol 1, except it's tweened to bounce vertically.
- Symbol 2 is being tweened to go left to right, making it look like a ball crappily bouncing from L to R.
You can even combine symbol tweening with FlashWhip's Frame to Symbol above to make even cooler shit. It's especially useful when I don't want to use a V-Cam (which is like... all the time?) wherein I just put the entire animation in a symbol so I can add camera shaking, panning, rotation and all. Pretty neat :)
This one is something you need to learn more how to use rather than learn more about. Master using symbol nesting and boy you can make something good.
I might get some flak for this one, but...)
7.) Learn art first before animation. (please)
This is one I learned completely from experience.
Yes, I am aware, drawing for animation is different from drawing for illustration, but that doesn't mean the two are completely different; a lot of the same principles of art still seep their way into drawing for animation.
In 2020-2021 I took a long break from animation because of... reasons. My computer broke, and in that time I only had an iPad and a phone, and that iPad had ibisPaint in it. Instead of just lamenting like a little bitch, I took the time I had and poured it into learning digital art and, you know, art as a whole, and it just had a big effect on me.
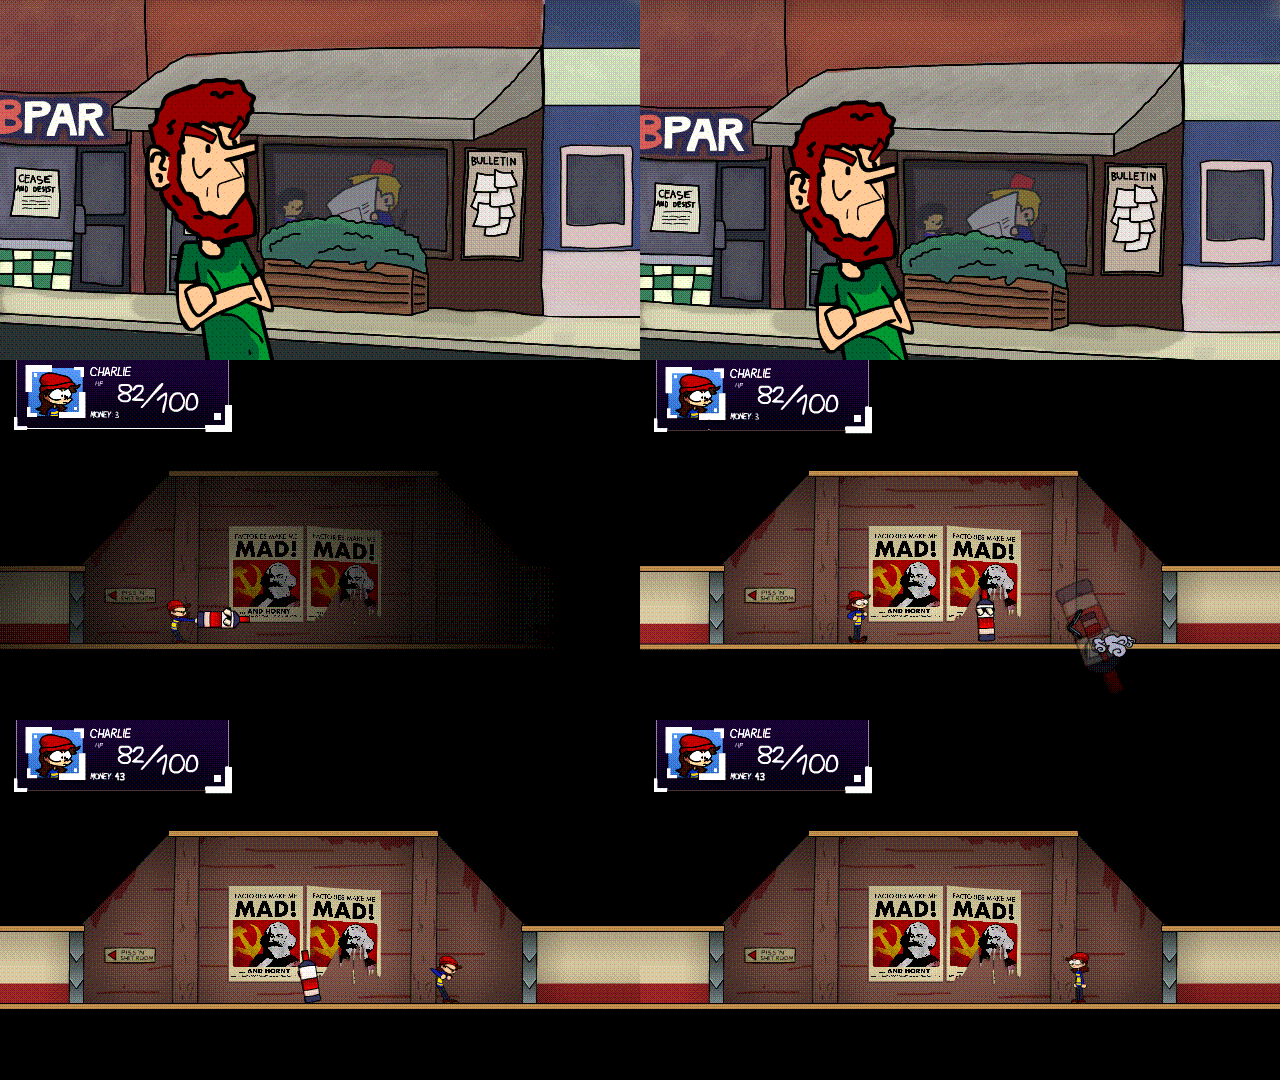
Figure 7: 2020's Red-Brick Assault, compared with 2021's fake trailer for A Waste o' Time.
Getting the hang of art does wonders. I don't know why the hell I didn't think of doing that sooner, probably because I was so focused on animation that I forgot I still have to learn art too.
Learning art helped make my animations look more visually pleasing (at least, the more serious ones, I’m not talking about obvious shitpost-y garbage like that Mall Santa video) and learning a little color theory along the way really helped not make my stuff be as badly colored as Lincar Rox’s fugly portfolio, though now that i think about it, that’s a real low bar to clear.
Please. I tell you this as someone who wished they did this when they started animating all those years ago: Take the time to learn the fundamentals of art, learn how to draw better... yeah. That sort of thing.
I can't upload anymore pics so I'd like to leave you with
7.) Some kewl plugins/commands/things :)
- ChenSmooth - the brainchild of Michael Shiao Chen. Smoothens your brush strokes. (Download)
- Boiler - Megacharlie's beloved plugin. A plugin that automatically "boils" a selection of keyframes.
- FrameScrub - Ajar Productions made Keyframe Caddy Pro its bottom bitch by allowing you to slide through graphic symbol frames instead of picking from a clunky gallery.
- Tween2Keys - turns frames in your timeline into keyframes by 2s.
- MultiSwap - swaps multiple symbols in your document with another symbol at once.
- AS3 V-Cam code - for AS3 projects only. idk I felt like putting this here. Instructions are included as comments in the pastebin
aw schweet a schizo thread!
Silicon14
Nice! Will defiantly use these in the future. Just one problem, tried clicking the download link for c5 Chensmooth but the link is broken. :-(